Just for my own learning record, I would like to pick out a few of the key learning points for me so far from my quilt classes. Just as a memory trigger. They all concern how to do the following in an accurate manner:
- prepare fabric and check that its grain is sitting naturally/ straight before it is cut
- cut fabric using a rotary cutter and mat (plus when best to cut the fabrics that you need)
- piece fabric (individual and groups of blocks)
- do and don'ts of handling fabrics during piecing
- folding seams during piecing to prevent clunky seam overlaps underneath the quilt top.
While seam folding is an integral part of piecing, I have separated it out because I'd like to focus on it for a minute. This is one of the learning points that I really do not want to lose (in terms of working out how to approach seams on completely different blocks in the future). While I expected there to be a whole lot to learn on this course, I had no idea how important something as simple as seam folding would be.
I know. You will just have to humour me here. This quilting thing? It is seriously bringing out the neat freak attention to detail in me.
Thinking back, I remember admiring the back of the sample quilt top before I started this class. There was just something about how all of the seams seemed to dovetail together and the how flat the quilt top was that I really liked.
At the time, I did not think for a moment that the back of my quilt top would look anything like the sample. To be honest, I just hoped that the front of my quilt top would look okay. I had no idea that I could ever produce something that looks (almost) as neat and tidy on the back as it does on the front:

The reason for showing you my quilt back is to show you what I mean about how the seams are folded - as an future aide memoire to myself, really. Here is a close up of one of my blocks, marked up with arrows:
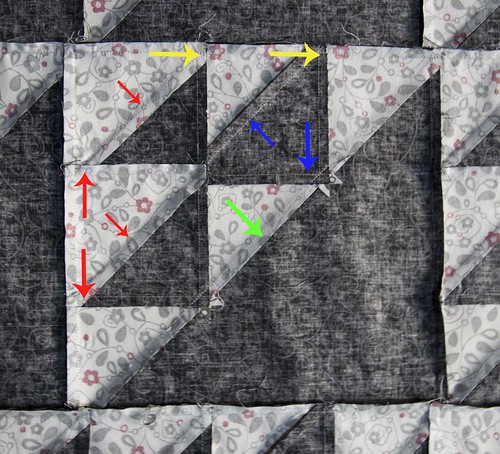
Key
Small arrows - half triangle square seam direction
Larger arrows – block building seams
Red – Row 1
Blue – Row 2
Yellow – Seams between rows
Green – Upper to lower triangle seam
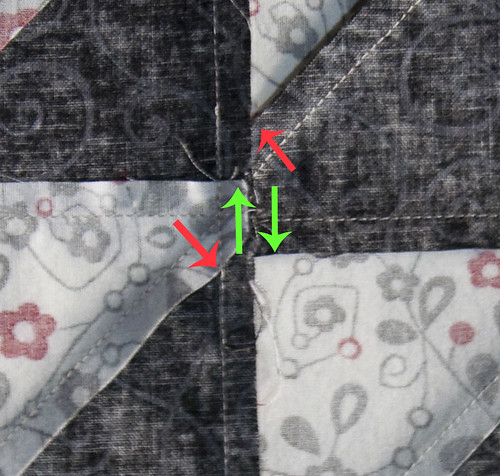
The arrows show what directions the seams on the smaller parts of the block were pressed (opposite ways). If you do this, it keeps seam overlaps to a minimum. This helps to keep the pieced fabric remain flat and makes quilting a little bit easier later on (apparently).
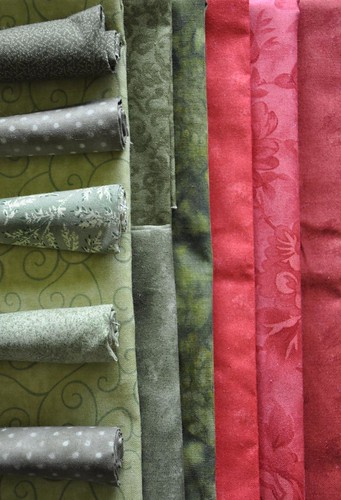
Just how cool is that?! This would never have occurred to me and eve if I had read it in a book, I would never have got my head around it - my head is just not wired that way.So my 4th class is this Thursday. We are adding the border to the quilt centre and we are learning how to do some appliqué. I think that the appliqué part is a vine that runs up the left hand side of the quilt. So I have picked out these fabrics as candidates for the vine stem and its leaves:
Just looking at these fabrics makes me realise that I am really looking forwards to Thursday and spending another evening in class. Not only am I learning a lot, I like everyone who is going to be there. Yep, quilting so far? It jigs, jives and rock 'n' rolls...albeit neatly, of course!

1 comment:
Dear God, woman! I'm dizzy just thinking about it. Seams of any sort are just not something this Piggy can handle.
(But it looks lovely, and I'm very happy you are enjoying them!)
Post a Comment